
In the Fall of 2001 I started building a cedar strip canoe. An enjoyable and rewarding pastime.
This page is a diary of what I did, with an emphasis on problems I had, and mistakes I made. Hopefully that way it will be of some help to others on considering the same thing. There are good resources on how to build a cedar strip kayaks and canoes on the web. At the bottom of the page you will find a few of my favorites.
This is under construction, and currently not complete. Some of the pictures are up taken during the building process, many are not yet.
Made a whole 2 wooden clamps. Following the system from Ted Moores Book Canoe Craft. Would be a lot faster If I had bought some Dowel so I could drill out a round whole, and not have to square it up. Spent approx. $8 on carriage bolts , wing nuts and washers for 12 clamps.
bought some Dowel 2, 4'x 3/4", and 1, 4'x5/8" for $1.50 - for more clamps
Manages to get the wood for 10 Clamps chiseled out, Dowel cut, wood pieces cut. Still need to Glue, and screwed. Using Dowel went much faster, and produced a more stable and square clamp.
Finished the 10 Clamps from the previous day. Sure am wishing I had a truck so I could go get the wood for the strong Back.
Bought 20 more carriage bolts, wing nuts and washers for more clamps.
(I only build a few more with this stuff)
2, 3/4"x4x8 plywood sheets for the strong back. These I had ripped at
home depot as follows: 8 at 8", 2 @ 12", 1 @ 4". (with a little less
than 4 left over). This is the way to go, cuts are strait and square,
better than I could have easily done with my table saw.
2 1/2"x4x8 sheets to be used for the stations, I had one of these
ripped in 1/2...
Build a T-Square jig to be used with the skill saw for cutting the cross pieces. All cuts for the strong box are made, except the center cross pieces.
working on strong back. have built up the two end pieces
Finished the center piece, and screwed the beam together (except the top) and finished building one leg. Still have to finish the other leg, and put the top on.M/P>
1 hr to finish up the strong back.
Well I started lofting the plans for the Ranger.... Note the are errors in the stem points. The corrections can be found on the bear mountain web page under the plans sections for the canoe (somewhere)
bought 4 - 4ft lights and some 14-2 wire to make the basement nice and bright. cost around $160
The rangers plans require stations taller than 24" Crap, I've already ripped the plywood. So should I change to the Huron Cruiser or plot the stations on the 24 inches, and try and move the mold up?
bought
Wired up the base ment for the extra lighting
finished wiring the basement, took about 1/2 an hour. Abandoned the plans to build the Ranger, spent 1.5hrs plotting out the Huron Cruiser. This time I did it all on one sheet of Paper. This is the way to go folks, it gives you the image of the canoe coming out of the page to you. It also allows you to see any errors in the lofting process.
Even with the data for the stem stations on the web page, I still seem to be missing a piece of data.... I'll come back to that later after I can think on how to do it. This is my first (of two) small bits of grief with Ted's Book, kinda lacking in the 'how to loft' section. I'll write up on how I did it.
I ripped the next sheet of plywood in 1/2 so I can transfer the remaining station and stem mold to the Wood. Whilst I had the table saw out I cut the previously completed previously completed stations off the plywood. maybe 1/2 an hour to do this.
I decided to plot the shear lines out from the book before working transferring the remaining stations to plywood. Plotting out the points is easy (see the magic diagram on the bear mountain canoe site). Once these points are plotted you need to subtract 3/4" to account for the inner stem thickness. I just eyeballed a perpendicular line and subtracted the required amount. However we seem to be missing two points. The shear line point and the 'Butt' point at station 6.
The Butt point at station 6 is pretty easy, the length to the forward edge of the stem at the butt point is the profile of Station 6 minus the thickness of the inner stem (i.e. 3/4"). This of course assumes the profile point on station 6 is to the inside of the wood strips. (As I Plotted, where as the book states it would be to the outside of the wood planking).
The shear point gave me a bit of greif... enough that I had to plot the lines to wood twice. Rather than demonstrate what I did, I'd recommend simply extending the line down with a fairing batten as far as possible (until the stem will almost hit the strong back, or if your canoe is longer than the strong back 3-4 inches). Then when planking put extra down, and cut back as required once you have installed the gunwales. This will give you a nice fair end point on the canoe.
Transfered stations 2 and 3 to the wood... argh, do not have enough plywood to do the last station
Note, you may like to flip one station of a station pair and check for
symmetry.
I've also screwed on the station blocks (or cleats, that connect the
stations to the strong back) these need to be re-screwed from the bottom
as my screws are two short.
My stem station seems to be 3/4 of an inch to short!! argh, perhaps the subtraction of th 3/4 of an inch was incorrect. That is the points given are to the outside of the inner stem ?? oh well.
bought some more clamps ($40 - 2-2", 6-3", and 4-4").
and 3 2x8" F clamps for $15
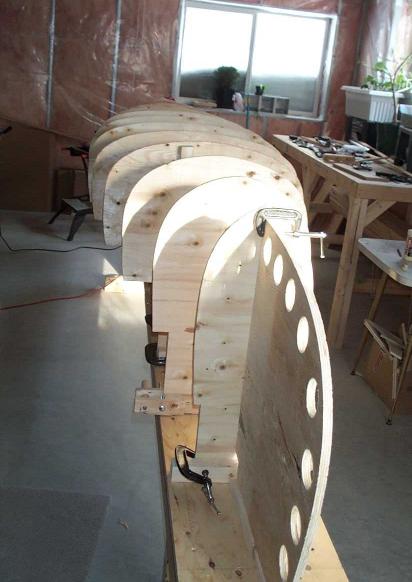
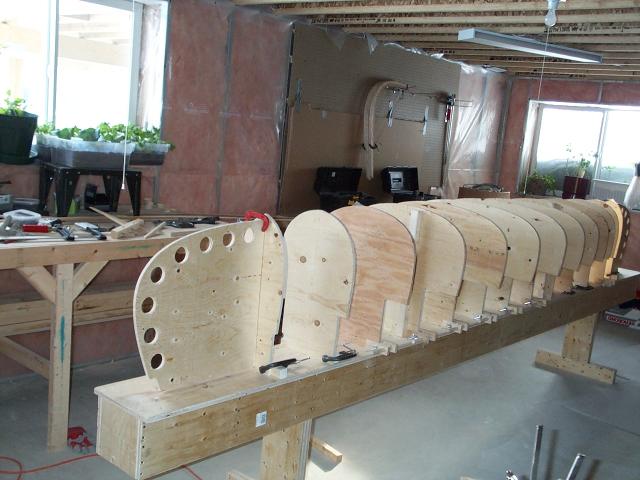
Cut out the remaining stations (except station 4, for which I have not yet
got wood), and have clamped in place on the strong back --- LOOKS GREAT!!!
Still to go: stem assemblies, Station 4 needs to be plotted on some wood and cut out.A
bought 24x48 sheet of plywood ($8) for final station. Transfered the points to the wood and dre the line.
Cut the last station, Drilled out the stem molds, Cut out the center of Station 7 (to subtract the thickness of the end stations
I resewed the brackets to the strong back, from the bottom
I spend the day putting around.
- Bought the Ash for the Stems $8
- Ripped it down (7/8" wide)
- ripped down some cedar for the inside stem. (left over from building my deck)
- Tried to make sure my plumb lines on the stations are OK, however looks like they may be out by approx. 1/8" due to my framing square being bad (not strait).
- put some of the cleats up for placing the stem mole up (on station 6 and the strong back)
Steamed and bent the stems - this worked really well. The 2" PVC pipe I bought ($5 or so) just fit the stems inside. I also ripped some batons from the 16ft left over decking I had. (odd, I had 1/2 a length left over from the deck, and it was clear... the only piece on the whole deck... amazing coincidence)
Bought the Bead can cove router bits from Lee Valley Tools $56.00 (Half the price of Home Depot) The stem assembly is now up on the strong back. I had to raise them a bit (3/4") and straiten them as the plywood was warped. Next time I'll use OSB, and be a bit pickier. Look some pictures!
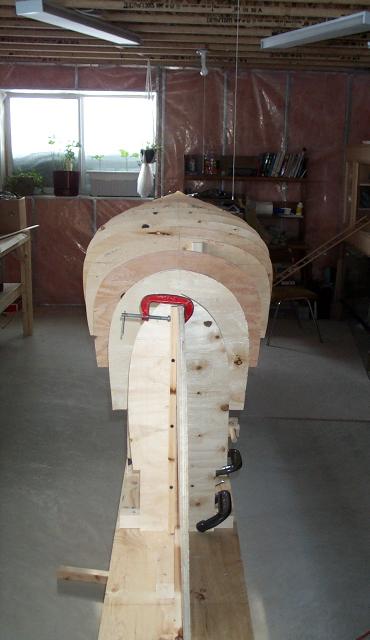
glued together my string jig, to be used to align the station molds strait down the strong back
Bought some of the fiber-glassing material here in Calgary.... Ouch. I paid extra, you can get it cheaper on the Web from http://www.noahsmarine.com.
Spent $300 on a decent Porter Cable router.
glued the stems up, I was rushing and did not do as good of a job as I would have liked. One stem is just short of the shear line.
Went to by the Cedar for the strips.... closed argh, finding a friend with a truck, driving across town and being closed.... got to learn to call
I've got the cedar for the planking, 16' lengths of clear cedar. 6, 2x2s, and 2, 2x4s. I've spent time finishing up the molds on the strong back, I've now got a batten piece in place along the top. I've marked off the center lines on the stems, and have begun shaping the inner stem (around 1/4 done shaping them). I'm rough shaping by eyeballing a line to the edge of the first station, rather than shaping as you go. (well a bit of that too). I'm using a chisel and a block plane todo this, I'll be buying a spoke shave tomorrow.
Shaping the inside stem to the rough shape, I'll have to work it closer as I plank after all. I bought a spoke save for $20, I guess you get what you pay for. I'm not sure if I'm using it correctly or if is is not a good tool, but it does not work all that well for me.
over a couple of evenings I've been building some saw horses that I'll be using to make out feed 'tables' for machining the planking
I've finished putting the Beads on all the planks. I'll be putting the coves on each plank as I need them. This is to try and reduce the damage to them just from having them around
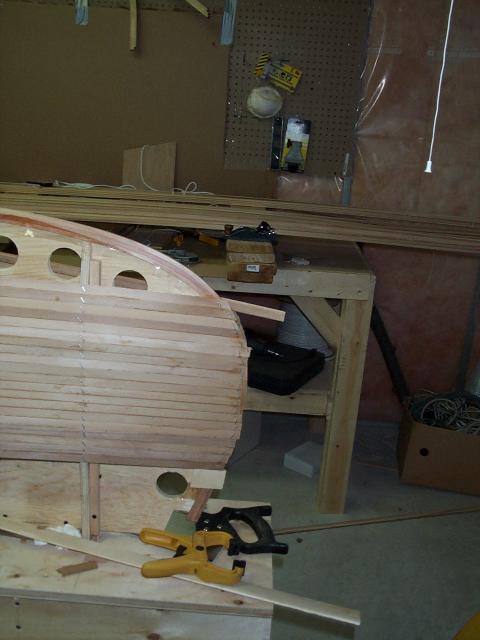
Put the Cove on one board, and just clamped it into place on the molds....yeah. So now Cove up of Down, I choose up, and since this is my first boat I'll go with staples.
Well here is where I stopped keeping a diary... I'd hoped to get a real estimate of the time taken. But now I just wanted to build my boat.... I took pictures as I went, which will follow below
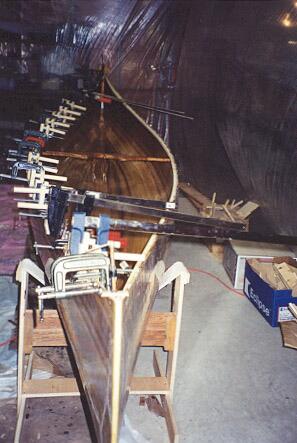
Work done now includes buying the 16ft boards to be ripped, ripping them, then routing out the bead and cove on each strip. The pictures show what look like some form of weird brace, these were simply guides to help me slide each strip into place on the form. The picture is taken as the strips are starting to go around the bilge. The straps seen are to help hold the results from the twisting of the strip.
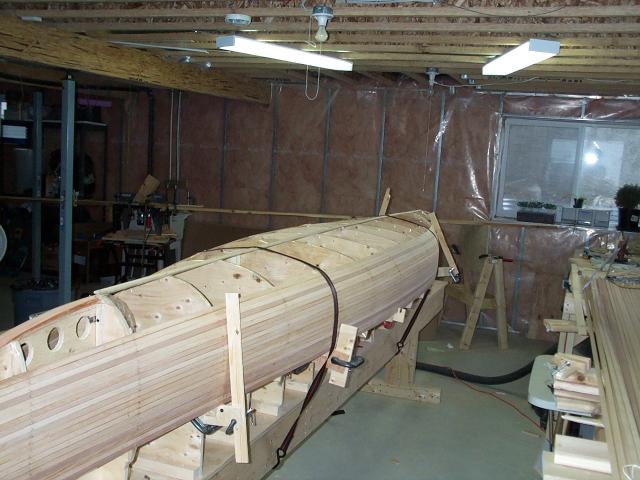

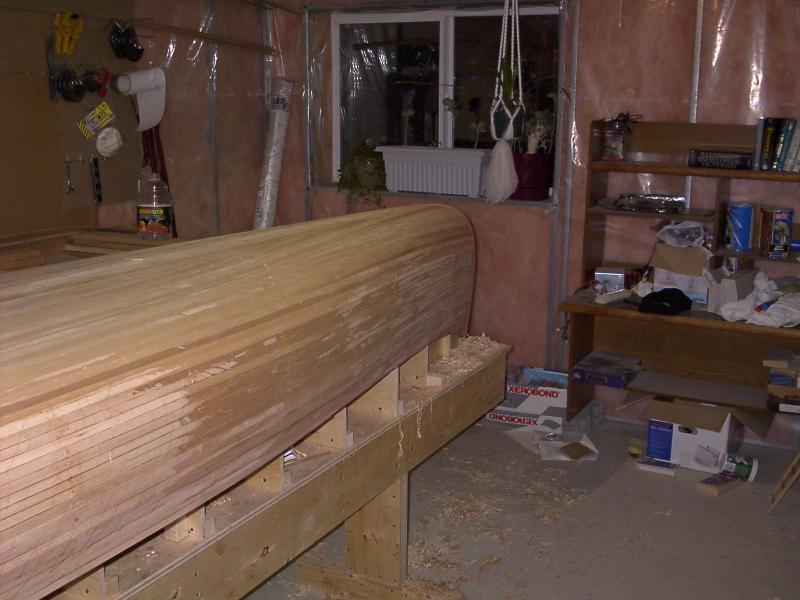
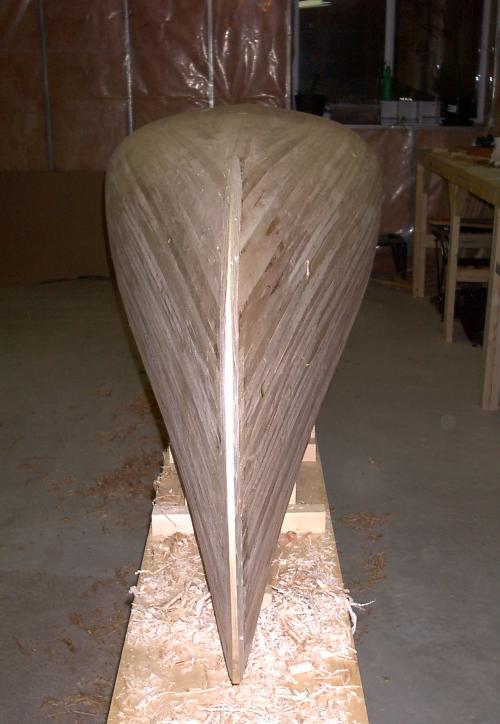
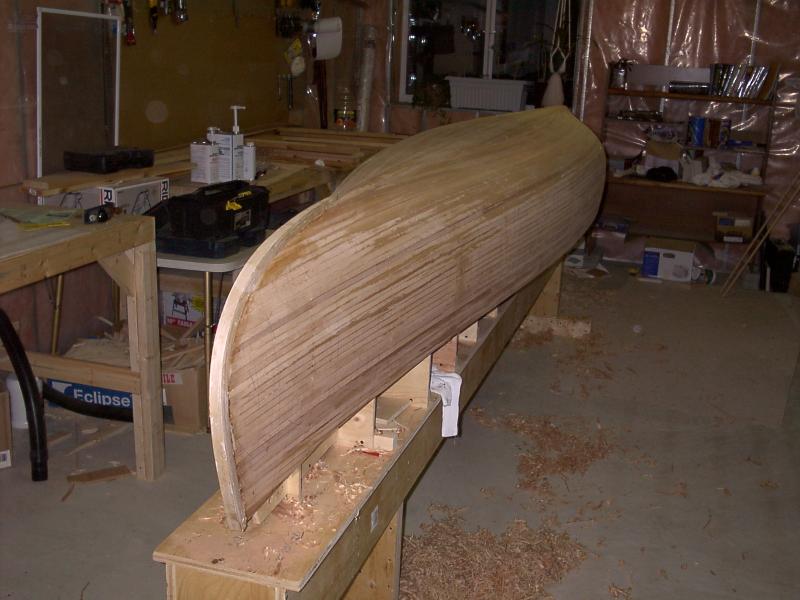
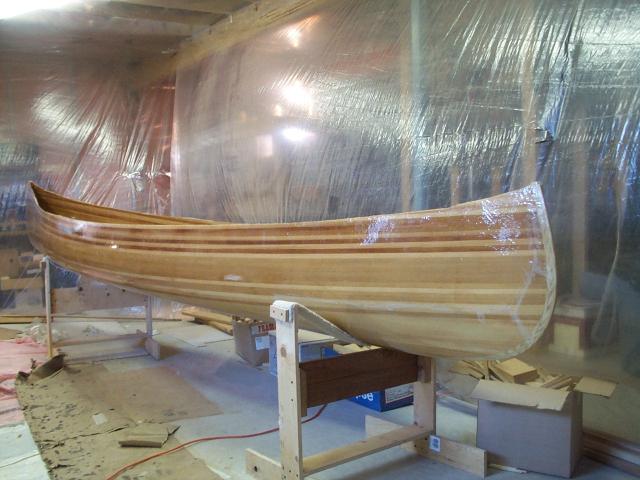
Oh oh... it's starting to look like a canoe (people don't laugh at me any more when they see my shop and here me say 'I am building a canoe'... I've finished striping. and have been doing a bit of plane work.


bought 3 board feet of ash ($17.97) for the inner gunwales (sept 7)
1.6bf of Cherry ($17.58) for the decks,
bought 3.6 board feet of ash ($18.93) for the outer gunwales (sept 15)
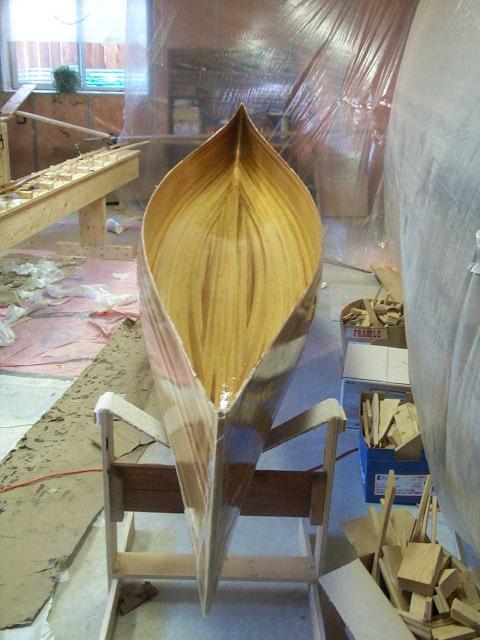
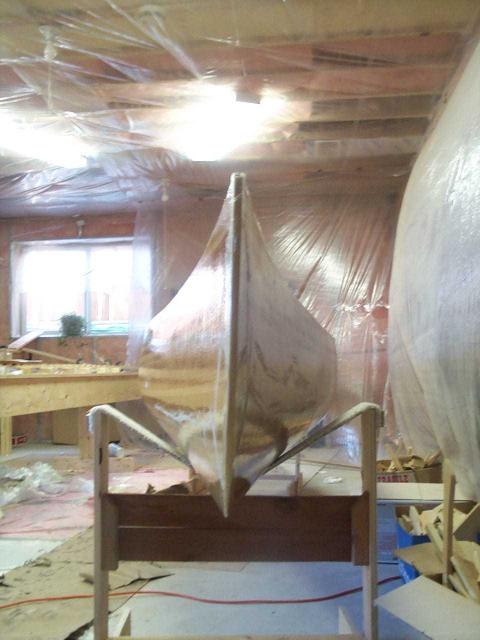
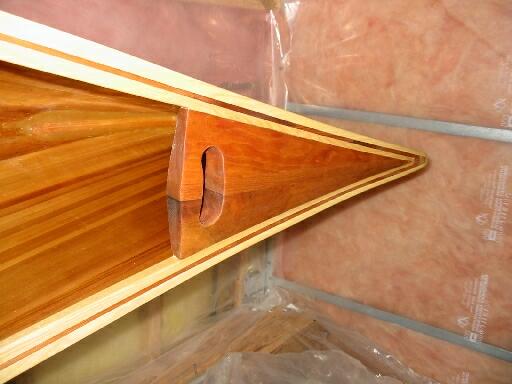
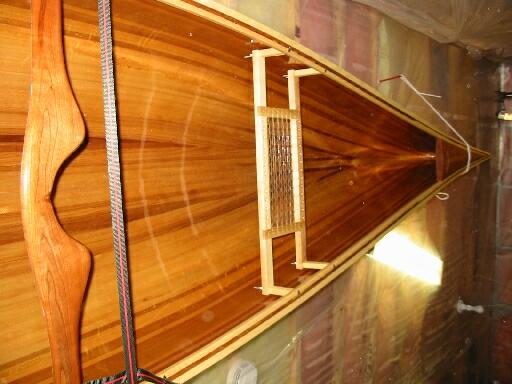
Here I've finished planing, and sanding. Both the inside and outside have been fiber glassed. I deviated from the book and put multiple layers of fiberglass... you can see the 'rub plate' I've put on the end of the canoe, as I've scraped the edge with a paint scraper to smooth it out. (oh there will be a note on this later). Additionally there is an extra 'football' shaped piece of fiberglass on both the inside and outside of the canoe, covering the bottom.
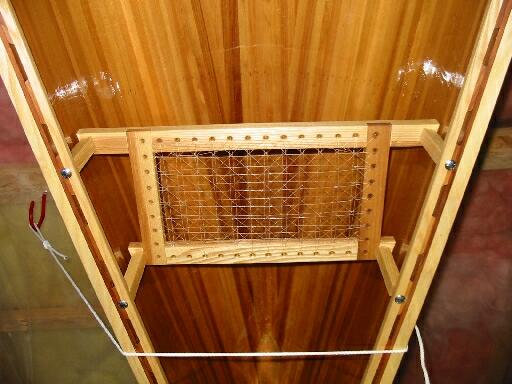
Putting on the inner gun whale, work now is making the gunwales, (scarfing shorter pieces of ash together, shaping a taper, and the profile. ) I've also ripped and cut pieces of cherry for the scuppers (little blocks of wood that go on the inner gun whale to leave holes for water to drain out when the canoe is upside down.
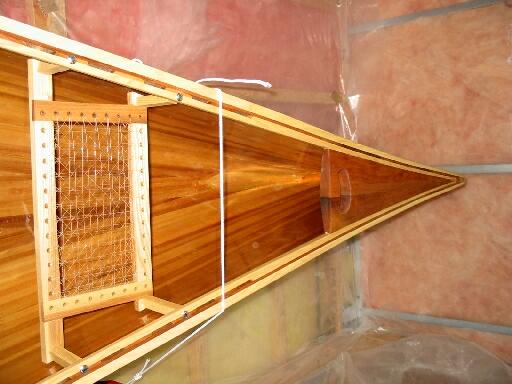
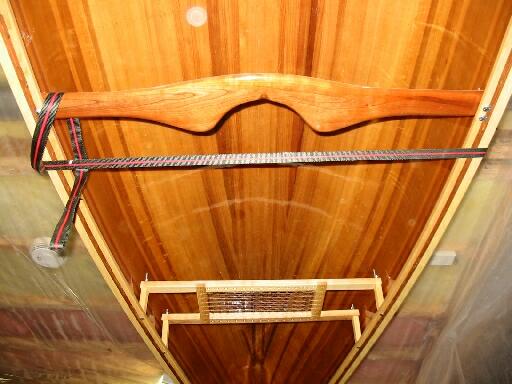
finishing work is: gunwales clamped, deck shaped and installed, yolk (bought) and installed varnishing the boat, oiling the gunwales, building and installing the seats
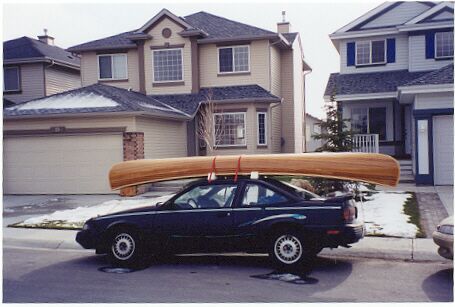
yes the canoe is strapped to the ceiling... it is almost done Just need some properly sized bolts for the seats, and I'll have to move them a bit
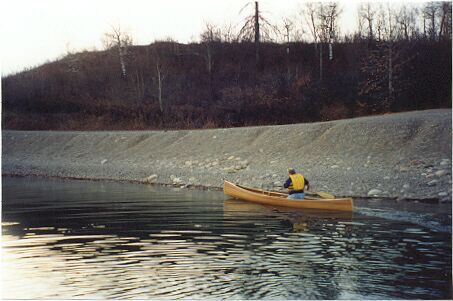
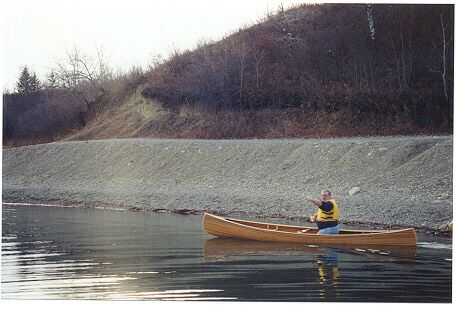
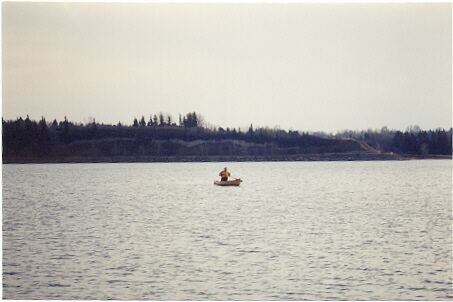
!!! LAUNCH !!!... Pics forth coming
The gunwales, deck, have been build and added. There are three coats of varnish inside and out (more varnish to come). the gunwales and deck have been oiled, and the (temporary) seats have been build and installed.
The canoe is still not quite done, I have to fix up the seats, one of the things I do not have much of an Idea of how to do is the caning. I've drilled holes, and woven in some fishing line for this launch. Hopefully I'll get around to the good stuff this winter. Some other minor things as well, still missing a thwart shown in the book, and the bolts holding the seat and yolk need to be changed. but this is pretty much it.
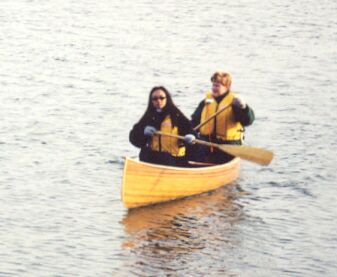
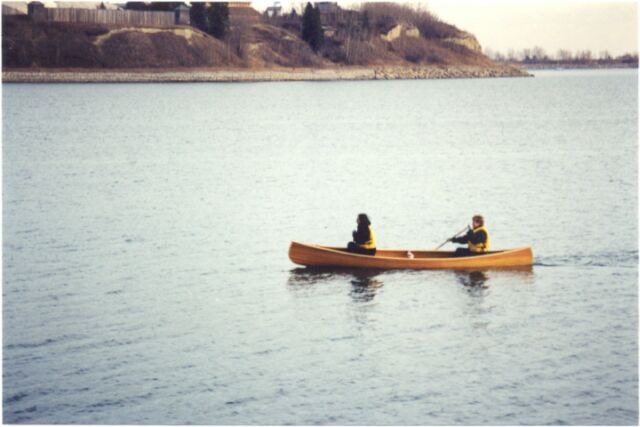
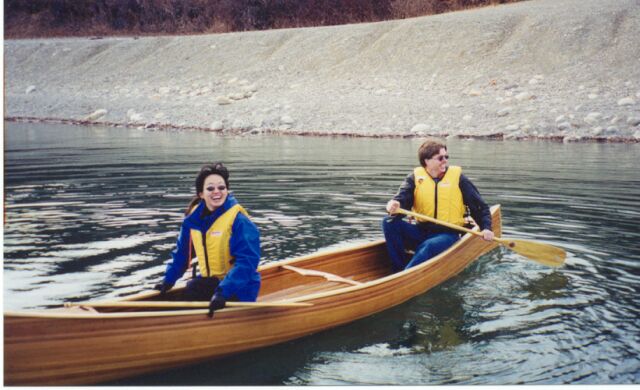
Well we are back from the test, there were 5 of us out braving the -1 Deg. C weather. Of course having finished my canoe, we are in some sort of drought, the fist place we went in Calgary was the Bowness lagoon, which was empty of water, then we drove across town to the Bow water canoe club, their water course was also missing the H20. Finally we ended up in the Glenmore Resevour... lots of water, but it was a bit exposed to the wind. Anyways, how did the canoe handle you ask... pretty much as expected. Given the round bottom, the some what narrow beam, and my putting the seats a bit high (10.5 inches from the bottom) I expected it to be a bit tender. Given that it was -1 out, I really did not want to do a wet exit.
It was down right scary when Garth and I were in the boat. Garth ways 250lbs, and I weigh 180, that made the boat down right scary. we are both not super experienced, I was in the front, and could not see what was going on, but I though for sure we were about to go swimming. I felt like th efrom was really high in the water, I'm wondering about the seat placement.
When Carla and Yao were in the boat it look pretty good on the water, they were the lightest combination, and the closed matched for weight... (I'd risk a beating if I gave the actual weight though, gee girls.) Both were complete novices in a canoe, and were able to make a turn in a light wind off the reservoir with out a problem.
I cant wait to get it out in the spring with my canoing buddy, who could not make it yesterday. Should be really nice in the river.