Summary: .
The main goal to day is to get the hull and deck joined together. The first step is to clean the edges of the hull and deck of drips of epoxy, and put a bevel on the edges so the outside edge will fit tightly. This leaves a 'v' on the inside joint that is filled with epoxy. I clean the edge of the Hull, and sanded down the few inches down from the joint so the fiberglass tape will have a good mechanical bond. All this work on the edges takes about 1.5 hours.
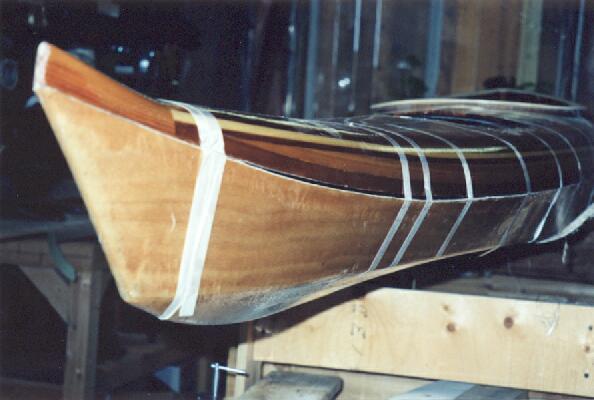
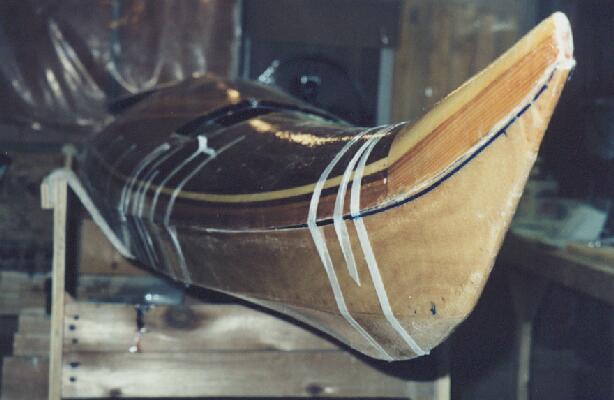
At this point I want to see how they will fit. I've not yet
cleaned or beveled the deck edge. The fit is ugly, my widening
the deck, combined with the shear strip slipping when I was
striping the deck results in large gaps at the end of the hull and
deck. I use a felt marker to mark where the hull needs to be filled
down to get a good mate. The pictures below will show what I'm talking
about. They the hull does stick out a bit on one side.
It only takes 10 minutes or less to take off all the fiber tape. It is much better at comming off without leaving residue, than both packing tape, and masking tape. After this 1 hour is spent rasping and sanding the edges of the deck down to a smooth bevel.
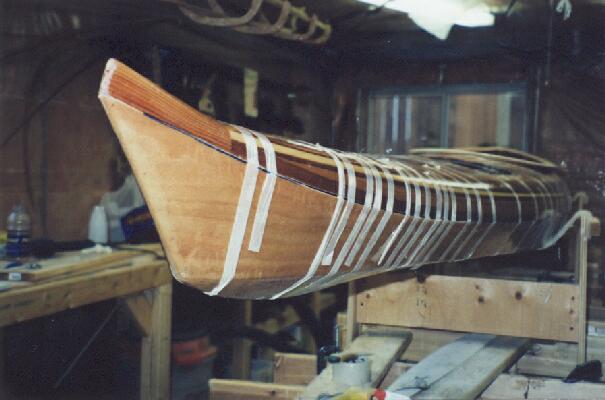
Finally time to start joining the deck to the hull. 4 hours it takes to get a good fit between the Hull and the deck using the fiber tape. I've run a bit of epoxy on the edge of both the deck and the hull to help hold in in place, as well as some thickened epoxy filler on the lip of both end pieces so the hull will have a solid joint to the deck at the ends. This means I must get the hull and deck aligned now.
As for pulling the hull and the deck together with the fiber tape, after a while of using the tension of the tape force the hull into position. After a while, I figured out that if you put the tape on either the hull or deck. Then force the deck to the hull (or vice versa) the pinching force would hold the alignment better, and the tape could pushed down.
Today I got two layers of tape on one of the inside seam. I'm going with one 3" and one 2" strips. I deviated from the book a bit, buy rolling them out on some wax paper, and saturating them with epoxy, and rolling them back up. I also ran a bead of thickened epoxy down the seam of the joint on the inside of the joint, just before rolling the tape out.
Fiberglassed the inside seam of the second side.
Ugh, this was not fun, spent 2.5 hours cleaning off the tape goo around the hatches. Used some acetone. Still not done.
1 hour and 15 mins with the wood rasp the edge of the hull deck joints to help flush the joint. Mostly this is to remove the epoxy buildup that resulted from the flowing through of the joint, although I had to remove a little wood at the joint, of this the only place that required considerable wood removal was at the deck ends. Not a problem there, as it is a solid block of wood.
Spend an hour sanding down the seam for a good mechanical bond. A quick clean with the vacume cleaner, after that I spend some time cleaning out the white dust in the pin holes, and the seam. The final strip goes on in about 1/2 an hour, using the same pre soak method as for the inside seams.
While waiting for the epoxy to dry, I make the bungie hold downs for inside the hatches. to do this I drew the basic outline on some scrap 3/4 thick ash. Drilled the holes, and cut out to a rough fit. Then some time with the bench sander and I got 4 through hole pad eyes, and 3 hook pad eys. I do need more but that is all the scrap ash I have.
Once the epoxy is at the geen stage I scrape with a paint scraper. I've done this before, but this time the second coat of epoxy does not cover the white line that was left by scraping. I figure I can sand it out later when the epoxy dries, and let it be. Once the fiberglass tape is in place I glue down the hatch holddown lips.
Hey suprise suprise, the white strips from the previous day ended up disappearing, good stuff. Spend an bit better than an hour sanding, chiseling the final seam, then epoxying the tape in place. Once it is hardened to the green stage, I scrape and put on the second coat of epoxy.
Spent some time and made more hooks for holdind down the hatches with bungee cords. I ended up using some left over maple. The left over epoxy got spread as another coat on the combing lip.