Summary: This is the final steps in the kayak.
I've lost the entries from my notes during building. Kitting out is
mostly adding all the stuff to make your kayak usable.
- Building the Seat
- Building the foot rests
- Installing the deck lines and bungies
- Finally varnishing the kayak
Building up the seat
I've built the seat, as per Nicks book. I made one mistake that
I've yet to correct, and I've not got it properly attached with
webbing However, It was good enough to take out on my first launch.
Overall I like it alot. It does not look fancy but it is confortable,
and seems very functional.
Building up the foot Brace
The foot rests are also from Nick's book, I did tighten up
the tolerences while making this. Over all I like it. I've only used
the typical side mount foot rests once, and quite a while ago. but
this one seems to make the most out of getting larger feet into the kayak.
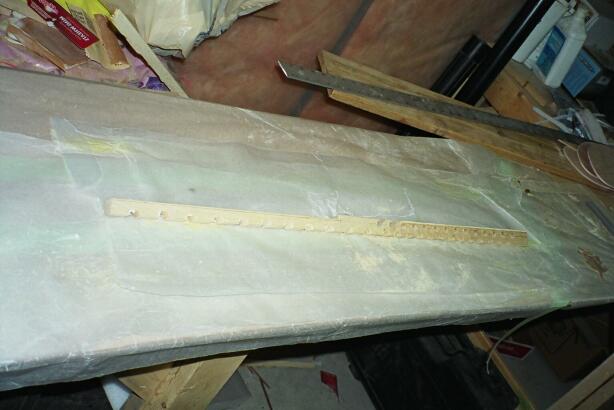
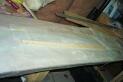
 In the first picture I've already drilled out the holes that are in
part of the rail. Some of the holes are just for weight, and
some act to set the location of the foot rest. You can see that alot of
the holes have tear out on the end. I used a drill press, to prevent
the tearout I had to clamp the rail for each drilling.
I made mistake while cutting with the table saw, I cut with
one edge of the board against the fence, then cut from the other
edge. This was a pretty rough piece of ash, and the width was not
consistant. Thus I ended up cutting down into my work piece. Argh.
In the first picture I've already drilled out the holes that are in
part of the rail. Some of the holes are just for weight, and
some act to set the location of the foot rest. You can see that alot of
the holes have tear out on the end. I used a drill press, to prevent
the tearout I had to clamp the rail for each drilling.
I made mistake while cutting with the table saw, I cut with
one edge of the board against the fence, then cut from the other
edge. This was a pretty rough piece of ash, and the width was not
consistant. Thus I ended up cutting down into my work piece. Argh.
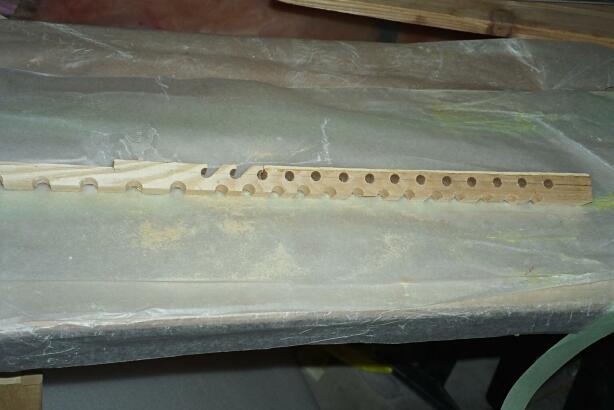
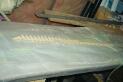
to fix the bad cut, I glued a thin pice of ash I had onto the
bad cut area, then re-ran this through the table saw, using the
correct edge this time. Worked like a charm, you can see the
extra piece as it is quite abit lighter than the original piece.
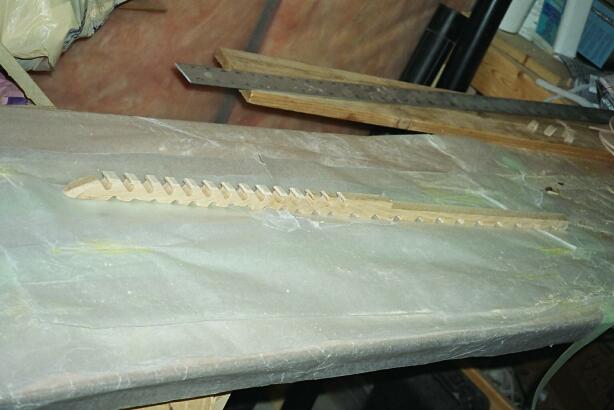
After that it is a matter of cutting out the notches. You can
see the final version of the rail below. It is on this Rail, that
the foot rest will run. I was really impressed with how well this
turned out.


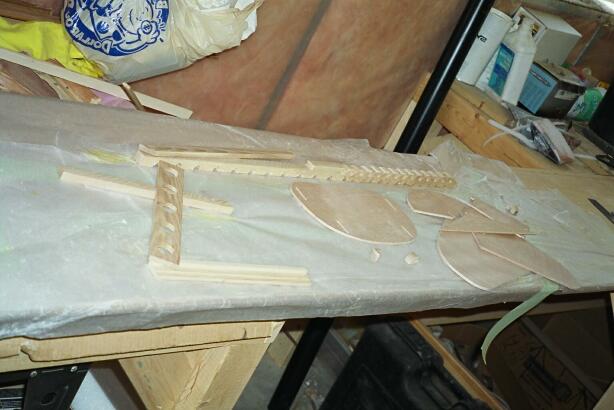
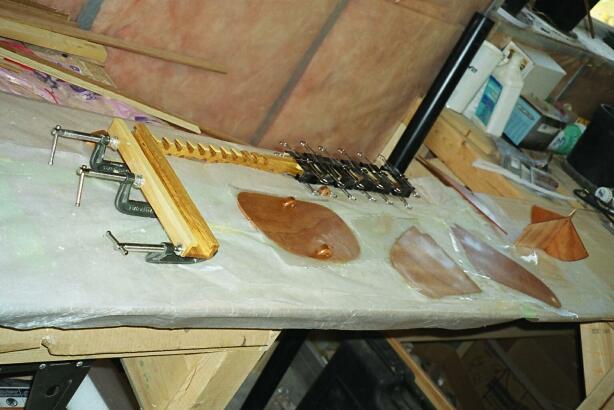
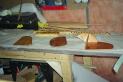
The next step is to build up the backing for the foot rest. Each
step below was done, allowing the epoxy to dry. The first picture shows
all the pieces. The dimentions are provided for in Nicks book, however
I effectivly reduced the width of the slider to get a tighter fit on the
rail. I think it worked out well. In the picture sequence is also the
backing for the seat, which I epoxied at the same time.

The next photo shows the building up the slider
(on which the foot rest is later secured) and the gluing of the
top rail piece to the rail. I've also got the 'back bone' of the
foot rest gluing togheter, and a layer of fiberglass going on the
foot rest wings, as well as on the seat backing.
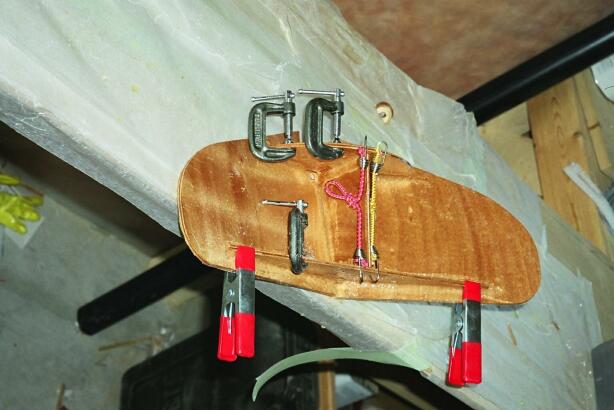
The final two pictures to the right show the first wing being glued
to the back bone of the foot rest which was glueing up in the previous
picture. It is good old Gravity that keeps these together. The final
picture is of the second wing, and the
skinny portion of the 'back' being glued together.
The picture is pretty busy, the spring clamps hold the skiny V to
both the wings. The tiny bungy coards hold the V to the center piece,
and the C-clamps provide weight so gravity can hold the back bone to
the final wing being glued on.

After this the foot rest is glued, to the slider. Here Had a
realization that I made a mistake, the 'backbone, was about 1/2 an
inch to high, and I had to glue in blocks to get a good secure bond
with the slider. (TODO: get a picture of the final foot rest)
The rail piece is glued in to the center of the kayak. I estimate
that this flimsy looking thing has taken about 80-120 lbs of force on
my first launching of this kayak. Yes I launched prior to having deck
lines and the complete varnish job done.
Bungy Lines, and deck lines
I choose to put the bungies on using eyelets, drew the patterns
on some left over 3/4 inch thick ash. Drilled out in the center of
each pattern. Cut to the rough shape of the eyelet, then epoxyied
the eyelet (to seal it), and epoxied it to a sanded section of the deck
(I've not yet put the actual bungie cord on yet)
It took a few hours to make these, an hour or so to put
them in place. I just used thickened Epoxy. I should have
had more, as I had to go back and 'push' more epoxy under the
lip that resulted in places. Each Eyelet is custom fit to it's
location by rounding out the bottom edge using my dest top sander.
Early May 2003: Varnishing
Well it is getting close to the planed trip, and I still have to
get the protection layers on my kayak. That is The layer of Varnish
on the deck to protect from the Sun, and a layer of carbon thickened
epoxy on the hull from scrapes.
Sanding the epoxy
The first thing was to sand the entire kayak, the first attempt
with 150 grit went well. I used a spray bottle to keep the kayak
wet, and sanded by hand. I then wiped off with a damp cloth. It
worked well at keeping down the dust, but it does not allow
you to easily see how well you are sanding the area. The sanding was
done during a snow storm, and in the garage. After the first pass
with sanding I moved the kayak to the basement, confident the Spray
and wipe would allow me to eliminate the white dust all over the basement.
After bringing the kayak in and letting the kayak dry, it became
obvous I'd be working the sand paper some more. At the time I grabbed
100 grit sandpaper, but did not notice. Anyways I sanded down the
deck some more, sand an area, wipe with the damp cloth, rinse cloth,
repeat. After a total sanding time of... say 2 hours, the kayak was
ready for the finish.
I should note that all the eyelets proved to be a reall anoyance to
sand, and sand around... Next time I'm makeing the recessed versions,
the look smarter, and would make sanding the deck a snap. I do not
think they are reall that much harder to do.
Carbon/carboxil (sp?)/ expoxy on the hull
After following the boards, reading advice, and talking to a friend
I re-afirmed my decision to apply a cabon thickened epoxy to the bottom
of the hull. This should make the coat harder, and resist deep scratches.
(TODO: Add link to other builders site that recommends this)
I used an aproximate ratio (by volume according to the eye) of 25%
Carbon dust, 10% Carboxil, and the remaining in epoxy. This worked
out to Three pumps of epoxy (West pumps), 2 heaping table spoons of
carbon, and 1 heaping tablespoon of the carboxil.
A Fellow builder Rob. Purden from Edmonton, was telling me when
he did this that it took several coats to get good coverage. He said
it was 'slippery' and hard to get on. I suspect (will confirm) that
he had no carboxil. The carboxil thickened the mixture just enough,
that I was able to get a good coat with no (or at least few) runs
with a single pass. I used a thin strip I had laying around to
smear the black gunk on the hull, then used a foam brush to level
it out. I moved it until it had coverage, but seemed like it would not
run.
of course I taped off the area on the hull. Below are two pictures
one with the gunk on, with tape... what a mess, then after taking the
masking tape off. Suddenly it looks pretty sharp. FWIW, my hull is
the Stitch and glue, I choose to run the Black line just up over the
stitch marks.

That was pretty easy, I'll come back at the end of the summer, or
during a rainny spell and try and get another coat or two applied.
The varnish.
For my varnish, I was going to use the water based vanish by fleco,
but shied away at the last minute, and whent with the oil based spar
vanish... the comparison sheet showed that the oil based is not as
hard but resists cracking.
I ended up wipping down the deck several times, after several feet
of wipping I'd go rinse my old tee-shirt. the continue on. Finally
I re-wiped every thing yet again, doing the entire deck. Now for the
varnish. I put this on with a 'regular' paint brush... it went on well
enough. the protruding eyelets gave me a bit of grief with drips, but
other than that there is only a few.
After getting the first coat on, and waiting about 4 hours, it was
still sticky, but firming up. I decided to put a second coat on... this
may not be a good Idea. I did it, I was rushing, and of course, missed
a few spots... I'll sand and put the third coat on later in the summer,
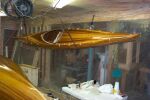
and get a real nice finish on. From the 10ft rule the deck looks quite nice
for the left over fence boards it started as (in my eys anyways).
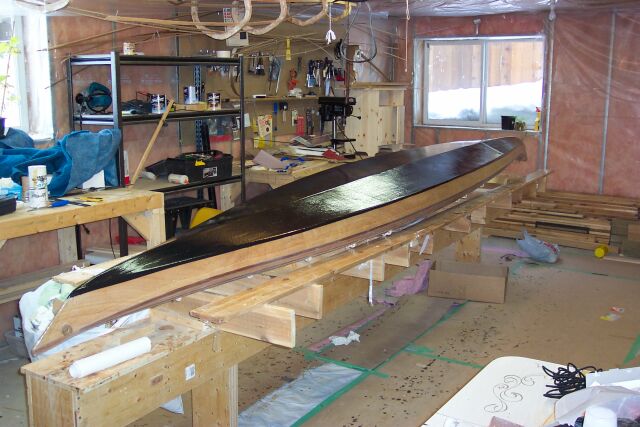
here is a picture of it hanging from the ceiling, while I was re-varnishing
the outside of my canoe.
So what is the problem with the second coat of varnish while the
first was still a bit wet. After discussion on the KBBS on the topic,
I suspect I'll be okay, it just takes the varnish a lot longer to cure
as the second layer denys the first access to the air it needs. Because
I coated before it was dry I am not worried about one layer flaking off.
Having said that it was pointed out it is not like epoxy, and little
chemical bonding would have occured had it been hard to the touch. Time
will tell, as to how well it holds up.
I did have a fair bit of dust in the epoxy, it could have been due
to the cloth I was using, as I did not go get a clean one for the final
wipe down. That's okay, I'm sure most of it will come out with a sanding
for the 3rd coat. I did also have a few (I've found 3 so far) of the
fish eyes, at least that is what I think they are. Something repeled the
epoxy from small points about 2mm in diameter around the hull. Likely
it was my finger prints?? ther are only a few, I may do a spot sand, and
drop a very small drip into each one, one at a time. I'll do this on
a monday, and hope they have enough time to cure for the following weekend.
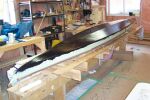
 Finally I just have Re-install the seat, put the hatch holdowns
back on, and then put the bungie cords back in place, and put
on the deck lines.. I'm just waiting for the Varnish to cure.
the following picture has the seat in, the hatches just sitting in
place and the deck lines yet to be put on as the kayak varnish dries.
Finally I just have Re-install the seat, put the hatch holdowns
back on, and then put the bungie cords back in place, and put
on the deck lines.. I'm just waiting for the Varnish to cure.
the following picture has the seat in, the hatches just sitting in
place and the deck lines yet to be put on as the kayak varnish dries.
STILL todo:
Not much, however my test float showed the rear hatch leaks,
I need to fix that.
Previous |
Back to Intro |
 In the first picture I've already drilled out the holes that are in
part of the rail. Some of the holes are just for weight, and
some act to set the location of the foot rest. You can see that alot of
the holes have tear out on the end. I used a drill press, to prevent
the tearout I had to clamp the rail for each drilling.
I made mistake while cutting with the table saw, I cut with
one edge of the board against the fence, then cut from the other
edge. This was a pretty rough piece of ash, and the width was not
consistant. Thus I ended up cutting down into my work piece. Argh.
In the first picture I've already drilled out the holes that are in
part of the rail. Some of the holes are just for weight, and
some act to set the location of the foot rest. You can see that alot of
the holes have tear out on the end. I used a drill press, to prevent
the tearout I had to clamp the rail for each drilling.
I made mistake while cutting with the table saw, I cut with
one edge of the board against the fence, then cut from the other
edge. This was a pretty rough piece of ash, and the width was not
consistant. Thus I ended up cutting down into my work piece. Argh.