Summary: This section describes how I did may hatch covers on the deck. It more or less follows the method described in Nick shades book "the strip built kayak". However I put a little extra recess in my hatch lip, and will use rare earth magnets to hold the hatches in place.
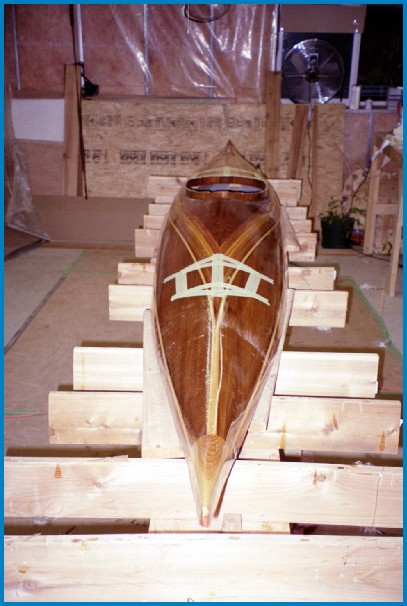
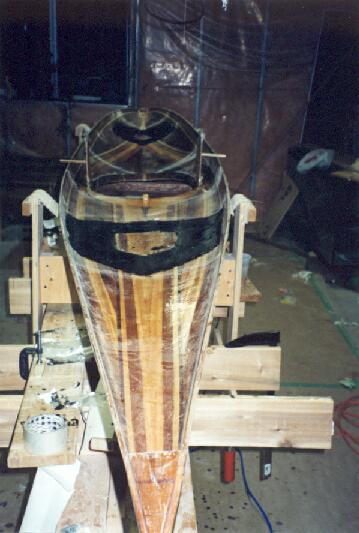
I spent 45 minutes drawing the lines for the hatchs on the deck. earlier I had spend 20 minutes or so trying to draw them on my computer, but abandoned it as my computer is still not setup well. I used the sizes in Nick's book, however I moved the rear hatch back a bit, I made in narrower. Also at the rear of the kayak, the lines were close to being the same as the strips. so I modified it to run right at the junction between two strips.
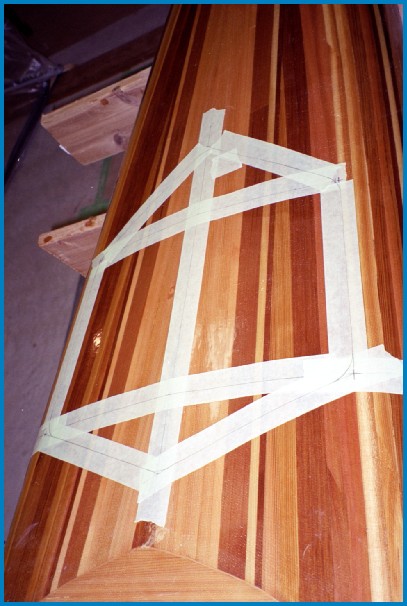
It was a pretty simple process to draw them strait on the deck. the only drawback is you have to pretty much know where you want them to go. I put masking tape strait down the top of the deck's center line. Drew the line right down the center, marked the distances on the masking tape. The laid perpendicular lines of tape over these points. And drew the point for each corner of the hatch. Finally I laid out tape strait between the points, and played connect the dots. This works pretty well as you can see through the tape a bit.
I radiused the corners using the same method as in Nick's book.
Before I cut out the hatches, I moved the rear hatch back to lay about 15 or 16 inches behind the cockpit. Cutting did not go as well as I would have liked. I used the model saw to cut the strait sides of the hatch. However this was to wide to make the turn at the corners.
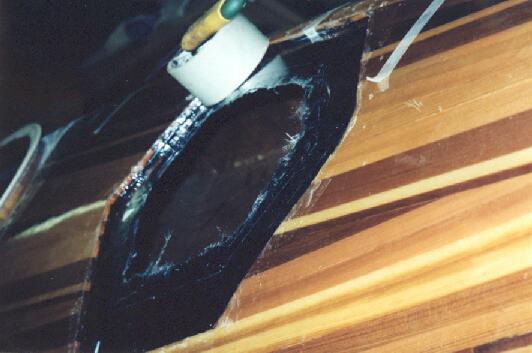
For the corners what I did was I snipped the end off of a coping saw blade. Taped up the other end, to use as a handle. This is what I used to cut around the radiused corners used that to cut the corners. This was not Ideal. The blade is thicker than the modeling blade so there is a bit of a increase in the size of the cut. This in itself would have been okay, however The blade was hard to control and get a nice fair curve to the cut. Further more the blade wanted to twisted in the up down direction. I got better at controlling it after a few corners, but still it is kind of ugly. I think I would have been better off to just cut strait in to each corner.
This section may belong in the fiberglassing the underside of the deck section. however it is here because I did it so much later. I also did not decided I would do it until after I had the hatches cut. Basically I want to run Fiberglass from the Cockpit out to the far side of the hatch holes. This is simply to add strength to the deck. I also want to build up the fiberglass around the hatch hole. This is both for strength and to allow for the hatch lip to be recessed a bit, allowing for the thickness of the hatch seal. Leaving the hatch flush with the deck when it is finished.
I spent about 1hour sanding. I did this with a hand block sander, and is the sanding from the cockpits out to the far side of the hatches. I also put some masking tape around hatch holes on the top of the deck. as well as on around the edges on the top and bottom of the hatches them selves. This is because the edge of the hatches are now bare wood from m being cut out of the deck. I'll be sealing these when I do my fiberglassing. The Idea is the tape would stop the epoxy from running onto the deck and hatches. (after doing this I do not recommend it, it made a bit of a mess with tape, tape glue, and epoxy)
It took about 1.5hours to lay the fiberglass out, and put a coat of epoxy on it. As well I sealed the edges of the hatches with epoxy.
About 5 hours later I came back and started cutting and placing strips for going round the hatches on the under side of the deck. I was going to put several layers on, but settled with two. These I epoxyied in place, and also sealed the edges of the hatch holes. This took around 1.5 hours.
Mostly working on the combing lip today, but did spend 15 minutes cleaning up the tape of the edges of the hatches. did not do a good job, it turned out to be a bit harder than I thought as the epoxy seeped under the tape and really glued the tape glue down.
The hatch holes I cut are at an angle, and the hatches sit in the cut out, nice and flush with the deck. I want to recess the hatch lip that the hatches will sit on. To do this I'm thinking I want to push the hatch lip down a bit and then build up the hatch lip as per Nick's book.
So I started cutting off the bevel around the hatch cutouts. After 30 minutes, I abandoned this. I decide I can temporarily build up the bottom of the hatch and have the same effect. I go and work on the combing lip.
15 mins sanding under the deck where the cheek plates will go, and
sanding around the edges of the hatch holes. I'm building up a hatch
lip using the method in Nick's book, and need the epoxy to stick to
deck with a good mechanical bond.
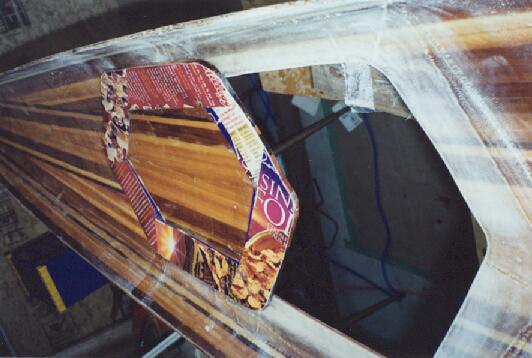
The hatch lip needs to be recessed a bit, so that the weather stripping will not push it up flush. I do not know how much of a extra drop the hatch needs to have. I decide that I will build up the underside of the hatch with two layers of cardboard from a cereal boxs. It takes one hour to get one hour for each hatch.
spent 10 minuts cutting out the cheek plates. The japanese pull saw, and the bench sander make very quick work of the job. Using Marine grade ply wood (4mm). They are a bit to flimsy, I may have to glass them.
Built up the pad eye for going on the underside of the deck behind the seat. Used a bit of scrap ash I had laying around. drilled out a 1/2 inch hole, then shaped it with the bench sander, worked well.
Boy, I bought the bench top sander to scarf my gunwhales together on my canoe, it is one of my most used tools now. I almost did not buy it. I'm glad I did.
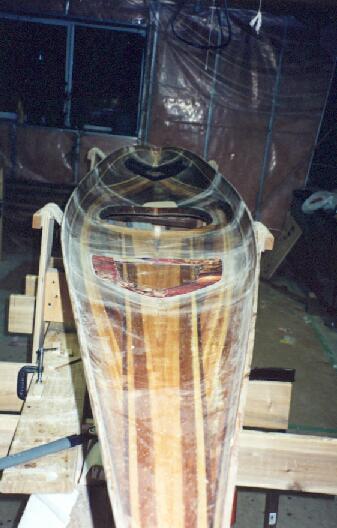
 Ok, Time to play with the epoxy again. Using strips of cloth,
over laping the hatches now taped in place, I build up the
hatch lips. I'm stunned, this takes 3.5 hours. I was expecting
to be at it for an hour at the most.
Ok, Time to play with the epoxy again. Using strips of cloth,
over laping the hatches now taped in place, I build up the
hatch lips. I'm stunned, this takes 3.5 hours. I was expecting
to be at it for an hour at the most.
While waiting for the hatch lips to set up (it takes 5-6 hours) I put in the cheek plates. (1hr 25mins). This took quite a while, I used short scrap strip pieces to hold the cheek plates vertical while I set the epoxy. to do this I tacked the strip to the edge of the deck with hot melt glue, and the tacked the end to the cheek plate. This brace worked quite well. Once the cheek plate was in place, a good sized fillet, with a strip of glass was put on the back side, a small fillet and the front side was completely covered in a piece of fiberglass. This was of course done for both cheek plates.
Well I have to get up at 1:30 AM. Yuck, but that it the time at which I figure the epoxy will be set enough to hold the hatch lip in place when the hatch is removed. I do not want to have the epoxy set completely, as it will make the hatch to hard to get off again. This takes about 1/2 an hour. I have alot of trouble seperating the hatch from the hatch lip.I try prying it of with shims of wood, using a painters knife no luck. Half in desperation, and half in frustration, I ended up giving the hatch lip a solid hit with my hand.
Pop, what a happy sound, followed by the hatch clattering on the floor. The bow hatch was off, a nice clean break from the lip. The same technique was applied to the rear hatch (prying followed by a hit). It to came off with a Pop and a clatter.
I'm up, and pretty excited/releived. So I spend a final 1/2 hour
taking off the layers of cardboard that I had put on the hatchs. There
were a few spots of blackened epoxy that got on the hatch covers.
a bit of wiping with vinegar took this off.
Finished up the cheek plates today, This was putting an additional
layer of fiberglass on both the inside and outside lip. After
this dried up for a 1/2 dozen hours or so a quick hit with the
sand paper on the edge to take off the sharp edge from the fiber
glass.
Also spend about 10 minutes cleaning up the inside of the hatches
so I can put on another layer of fibeglass on there. I want to
make sure that the hatch is good and strong, in the event I hvae
to have a person climb up behind me. and sit on the hatch.
The tape I used mark the hatch covers on the deck has left
a fair bit of glue residue on teh deck. I spent 30 minutes cleaning
the goop off the deck. As a note, the packing tape seemed to come off
cleaner than the masking tape, although I hear the painters version
of the masking tape comes of easier.
I'm joining the hull and deck by using fiberglass tape. If I
can reach inside by the hatch holes, it will make life a lot easier
So a bit more puttering around before I can get to the joining.
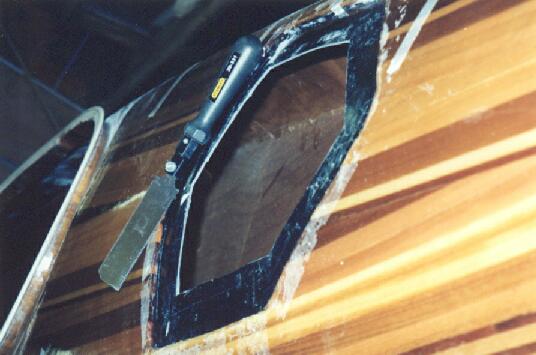
Cutting the lip is harder than I expect, It takes almost an
hour to cut both hatches with my modeling saw.
Also, I had failed to cover a bit of the cereal box cardboard
when I made the lips, so there was a piece of paper stuck to the
hatch lip about 2 inches square. This came off ease with water
and a quick scrap.
Note: the rest of the hatch stuff here was done after the Hull and
deck were joined.
I re-cut the hatch lip to a width of 1 and 1/4 inches.
The lip was also to high at the inside edge, this caused it
push the hatch up, so it stood quite proud above the line of
the deck. Cutting it back really helped, although the
problem is still there.
I also sanded back the inside corner of the hatch lip,
the hatch now fits much better but more work is required.
I think the problem was due to me taking the hatchs out
to soon when I made the lip. The epoxy must have been a bit
soft and bent down a bit, while the deck was upside down.
I realise I've made another mistake, I've already glued
the hooks, and padeye to the hatch. I've put them back over
two inches, now they will be a bit hard to reach when hooking
and un-hooking the bungee lines.
Finished up the rear hatch, same as yesterday on the front
hatch.
A seggestions from a friend at work, to heat the hatch lip
and see if I could re-contour it. I clamp a piece of wood
under the lip from end to end accross the hatch, this is
for support. I then heat the edge of the lip, and clamp the
lip down to the wood I put in earlier. This works like
a charm.
bought some 3/16th inch by 3/8ths weather stripping. and was
able to seal up the front hatch. However I'll have to replace
this as 3/16ths is to thick, and also pushes the hatch up.
Got half the seal on the rear hatch lip.
Sun Oct 20, 45 mins
Sat Oct 26, 1hr+1.5+1+4
 I've got a fairly wide hatch lip right now, and the edge is sharp
and serated(sp?). So I want to cut it back to somthing more reasonable
I'll be leaving a bit extra, as I intend to hold the hatches down
with magnets, and need a bit extra lip to hold the magnets.
I decide to trim the hatch back to 2 inches. Well actually, it
is the thickness of my roll of packing tape. Using the tape and a
putty knife I score the cut mark by holding the knife next to the
tape, and sliding the tap along the edge of the wood.
I've got a fairly wide hatch lip right now, and the edge is sharp
and serated(sp?). So I want to cut it back to somthing more reasonable
I'll be leaving a bit extra, as I intend to hold the hatches down
with magnets, and need a bit extra lip to hold the magnets.
I decide to trim the hatch back to 2 inches. Well actually, it
is the thickness of my roll of packing tape. Using the tape and a
putty knife I score the cut mark by holding the knife next to the
tape, and sliding the tap along the edge of the wood.
Monday Nov 4, 1 hr
Tuesday Nov 5, 1 hr
Wednesday Nov 6, 1 hr
Thursday Nov 7, 1 hr
Saturday Nov 9, 1/2 hr